The webpack plugin I can't live without
Get to know your bundles with the webpack-bundle-analyzer
tl;dr Install the
webpack-bundle-analyzerto visualize what's included in your webpack bundles and debug common problems.
Does webpack feel still a bit scary? Maybe a bit too magical? Too much of WTF is going on here?
It felt that way for me once. I was struggling to switch from Sprockets to Webpacker in a large Rails app. With Sprockets, I could require a jQuery plugin through a magic comment (the require directive), and it would "Just Work."
Such was not the case when I first started using webpack; ever seen an error like on the console?
'Uncaught TypeError: $(...).fancybox is not a function'
Yeah, you and me both.
Then one day, it all clicked for me.
My main problem was I didn't have a good mental model how webpack worked. To form that mental model, I researched dozens of articles, watched numerous screencasts, and read a lot of source code. One thing helped "flip the switch" more than anything else: understanding the product of a webpack build, the output.
It was right there in front of me the whole time.
Now you might call me crazy to say, "you should read the source of your bundled output," even assuming we're talking about the unminified/unobfuscated development build, so I'm not going to tell you to go do that. (Not without some guidance; let's save that for a future project).
But you can use a tool right now to visualize what's in your bundle. And that could be enough to make all the difference in helping you understand, at least at a high level, how webpack does its thing.
Introducing the webpack-bundle-analyzer
But, there is something else you can do that requires a lot less work: you can use the webpack-bundle-analyzer. You can probably get it up-and-running in less time than it takes to read this article.
Curious about or need help with webpack? I may be able to help! I'm developing a course for webpack on Rails and I frequently write about it on this blog.
The webpack-bundle-analyzer is a tool that you can use to visualize the contents of a webpack build. It parses the "stats" output of a webpack build and constructs an interactive Voronoi treemap using the FoamTree library.
It might look a little something like this:
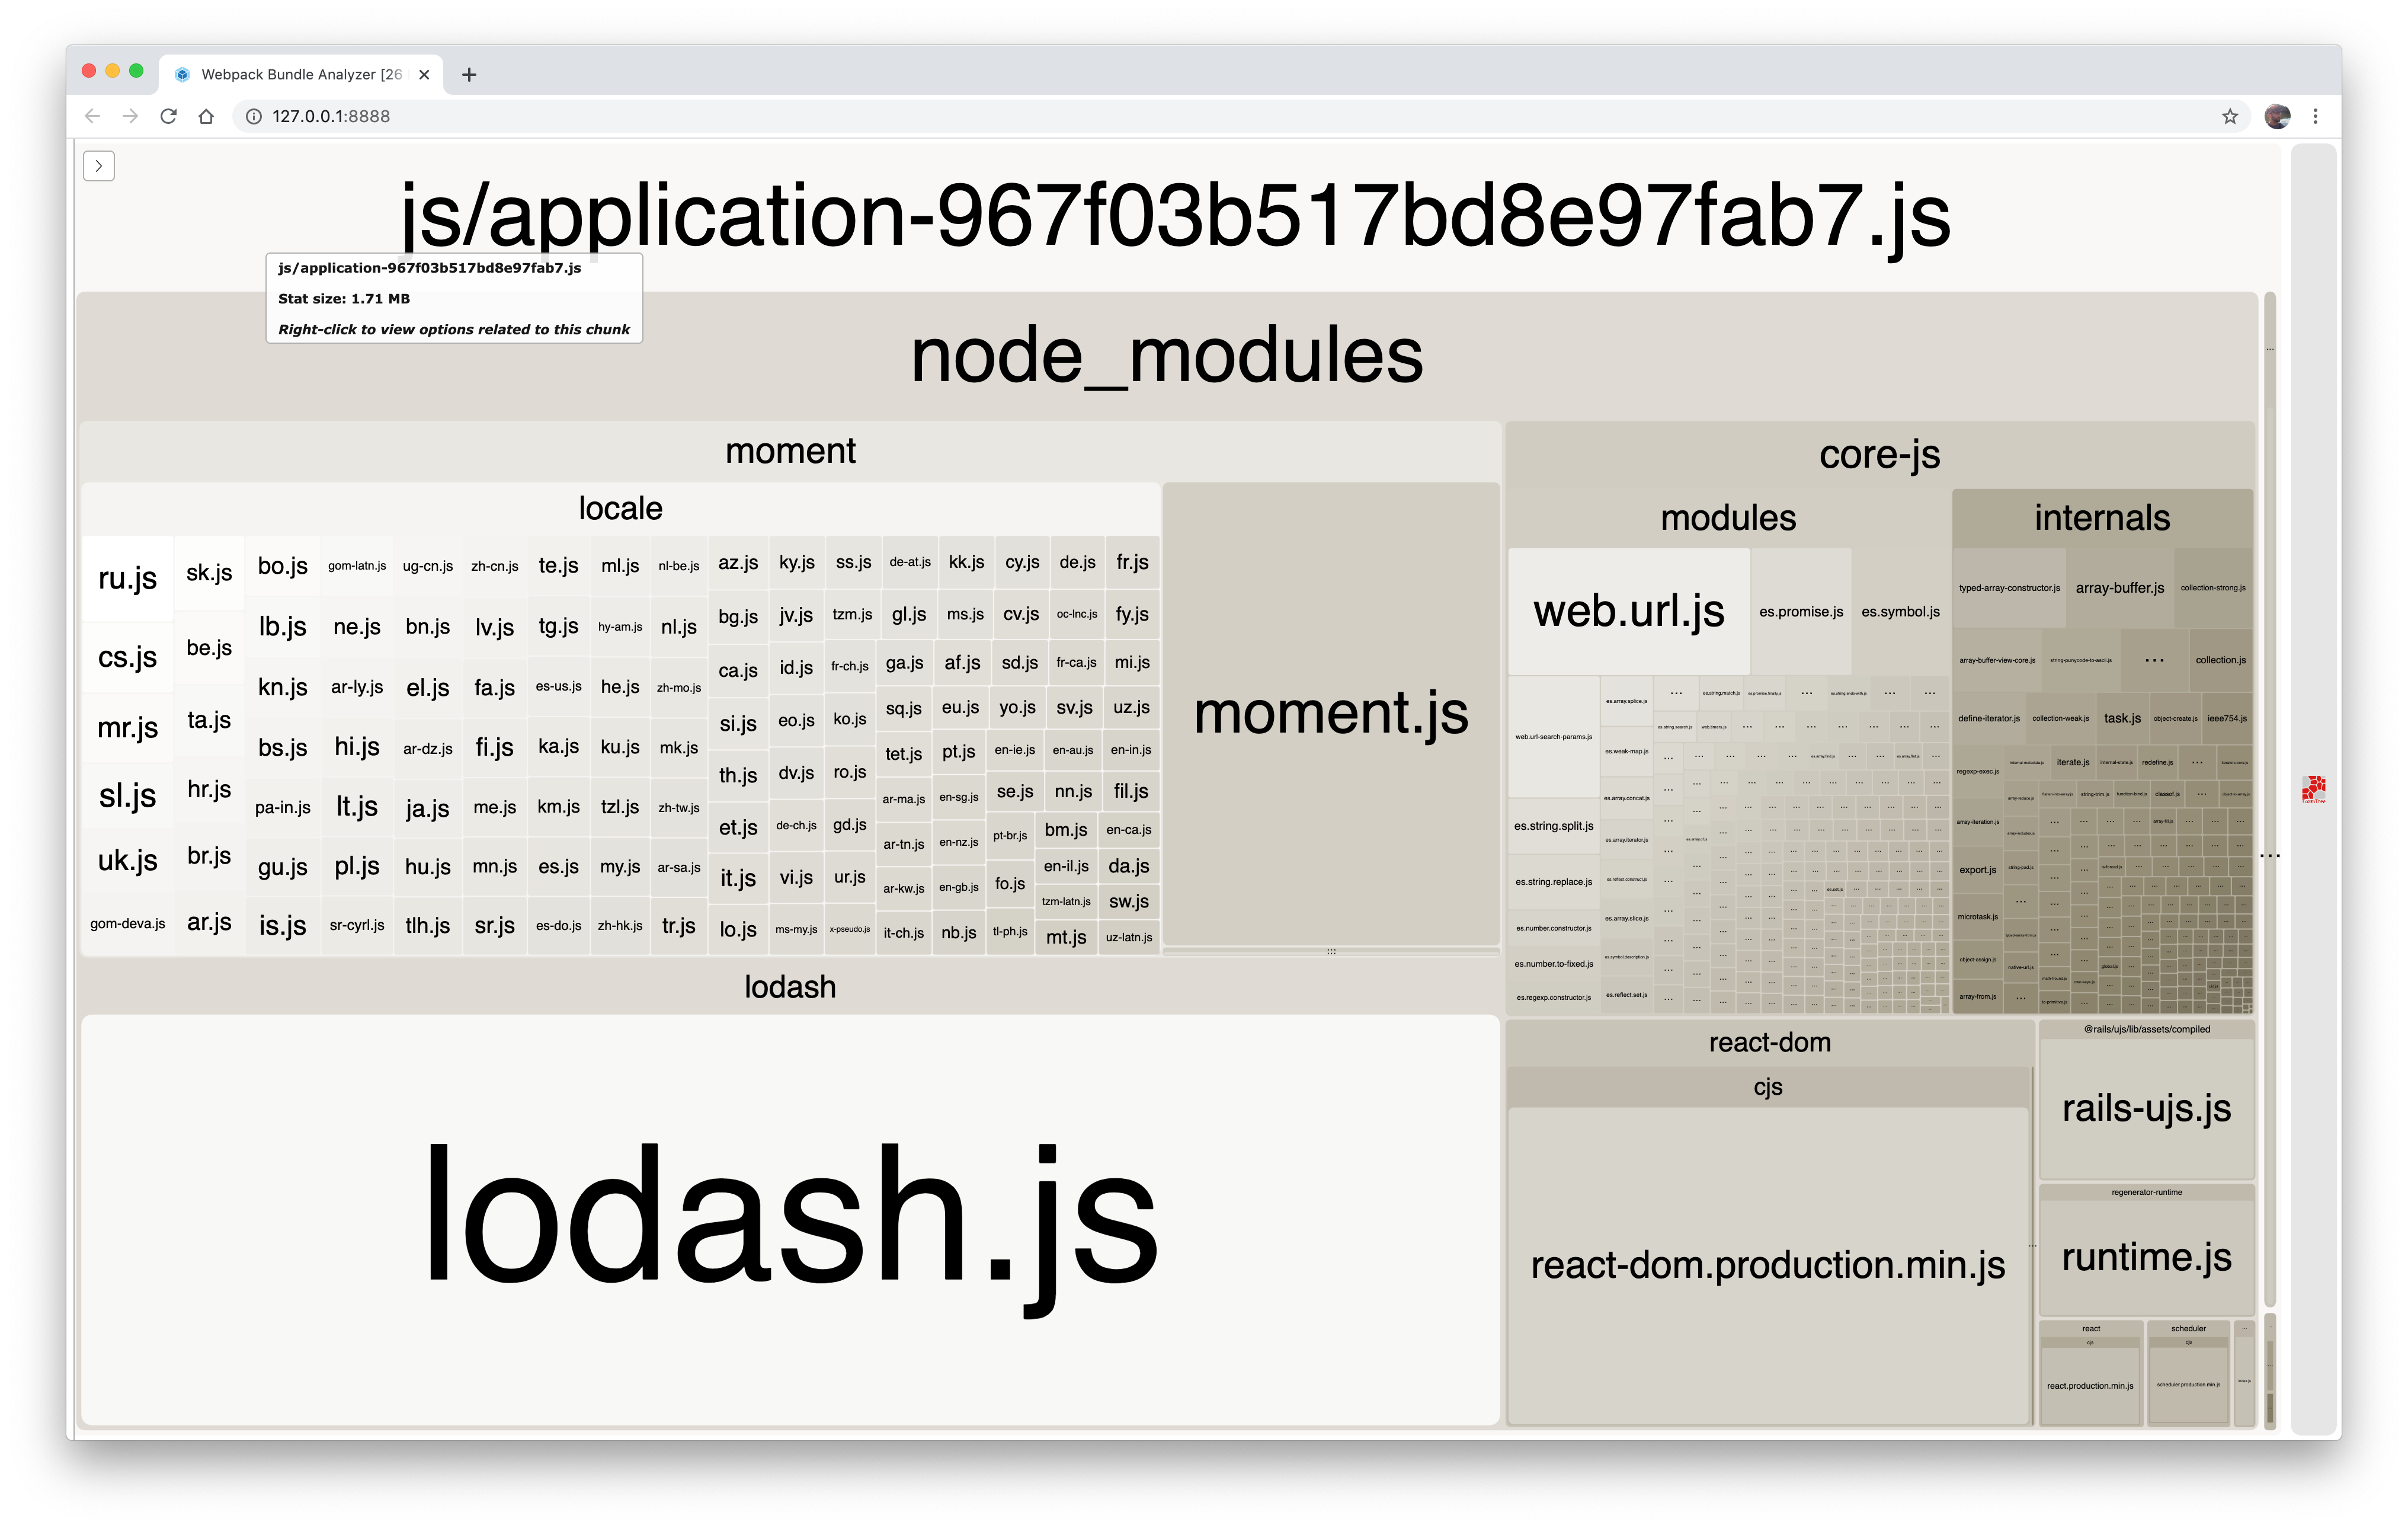
Funny story, this wasn't the first time I've come across Voronoi diagrams. The hands-down best Computer Science class I took at NYU was Heuristics with Dennis Shasha in which we learned algorithms for approximating solutions to NP-hard problems and applied them to compete in automated 2-player competitive battles including a gravitation Voronoi game. My source code is up on GitHub somewhere useful to no one else, serving mostly as a reminder I can accomplish big things under challenging constraints.
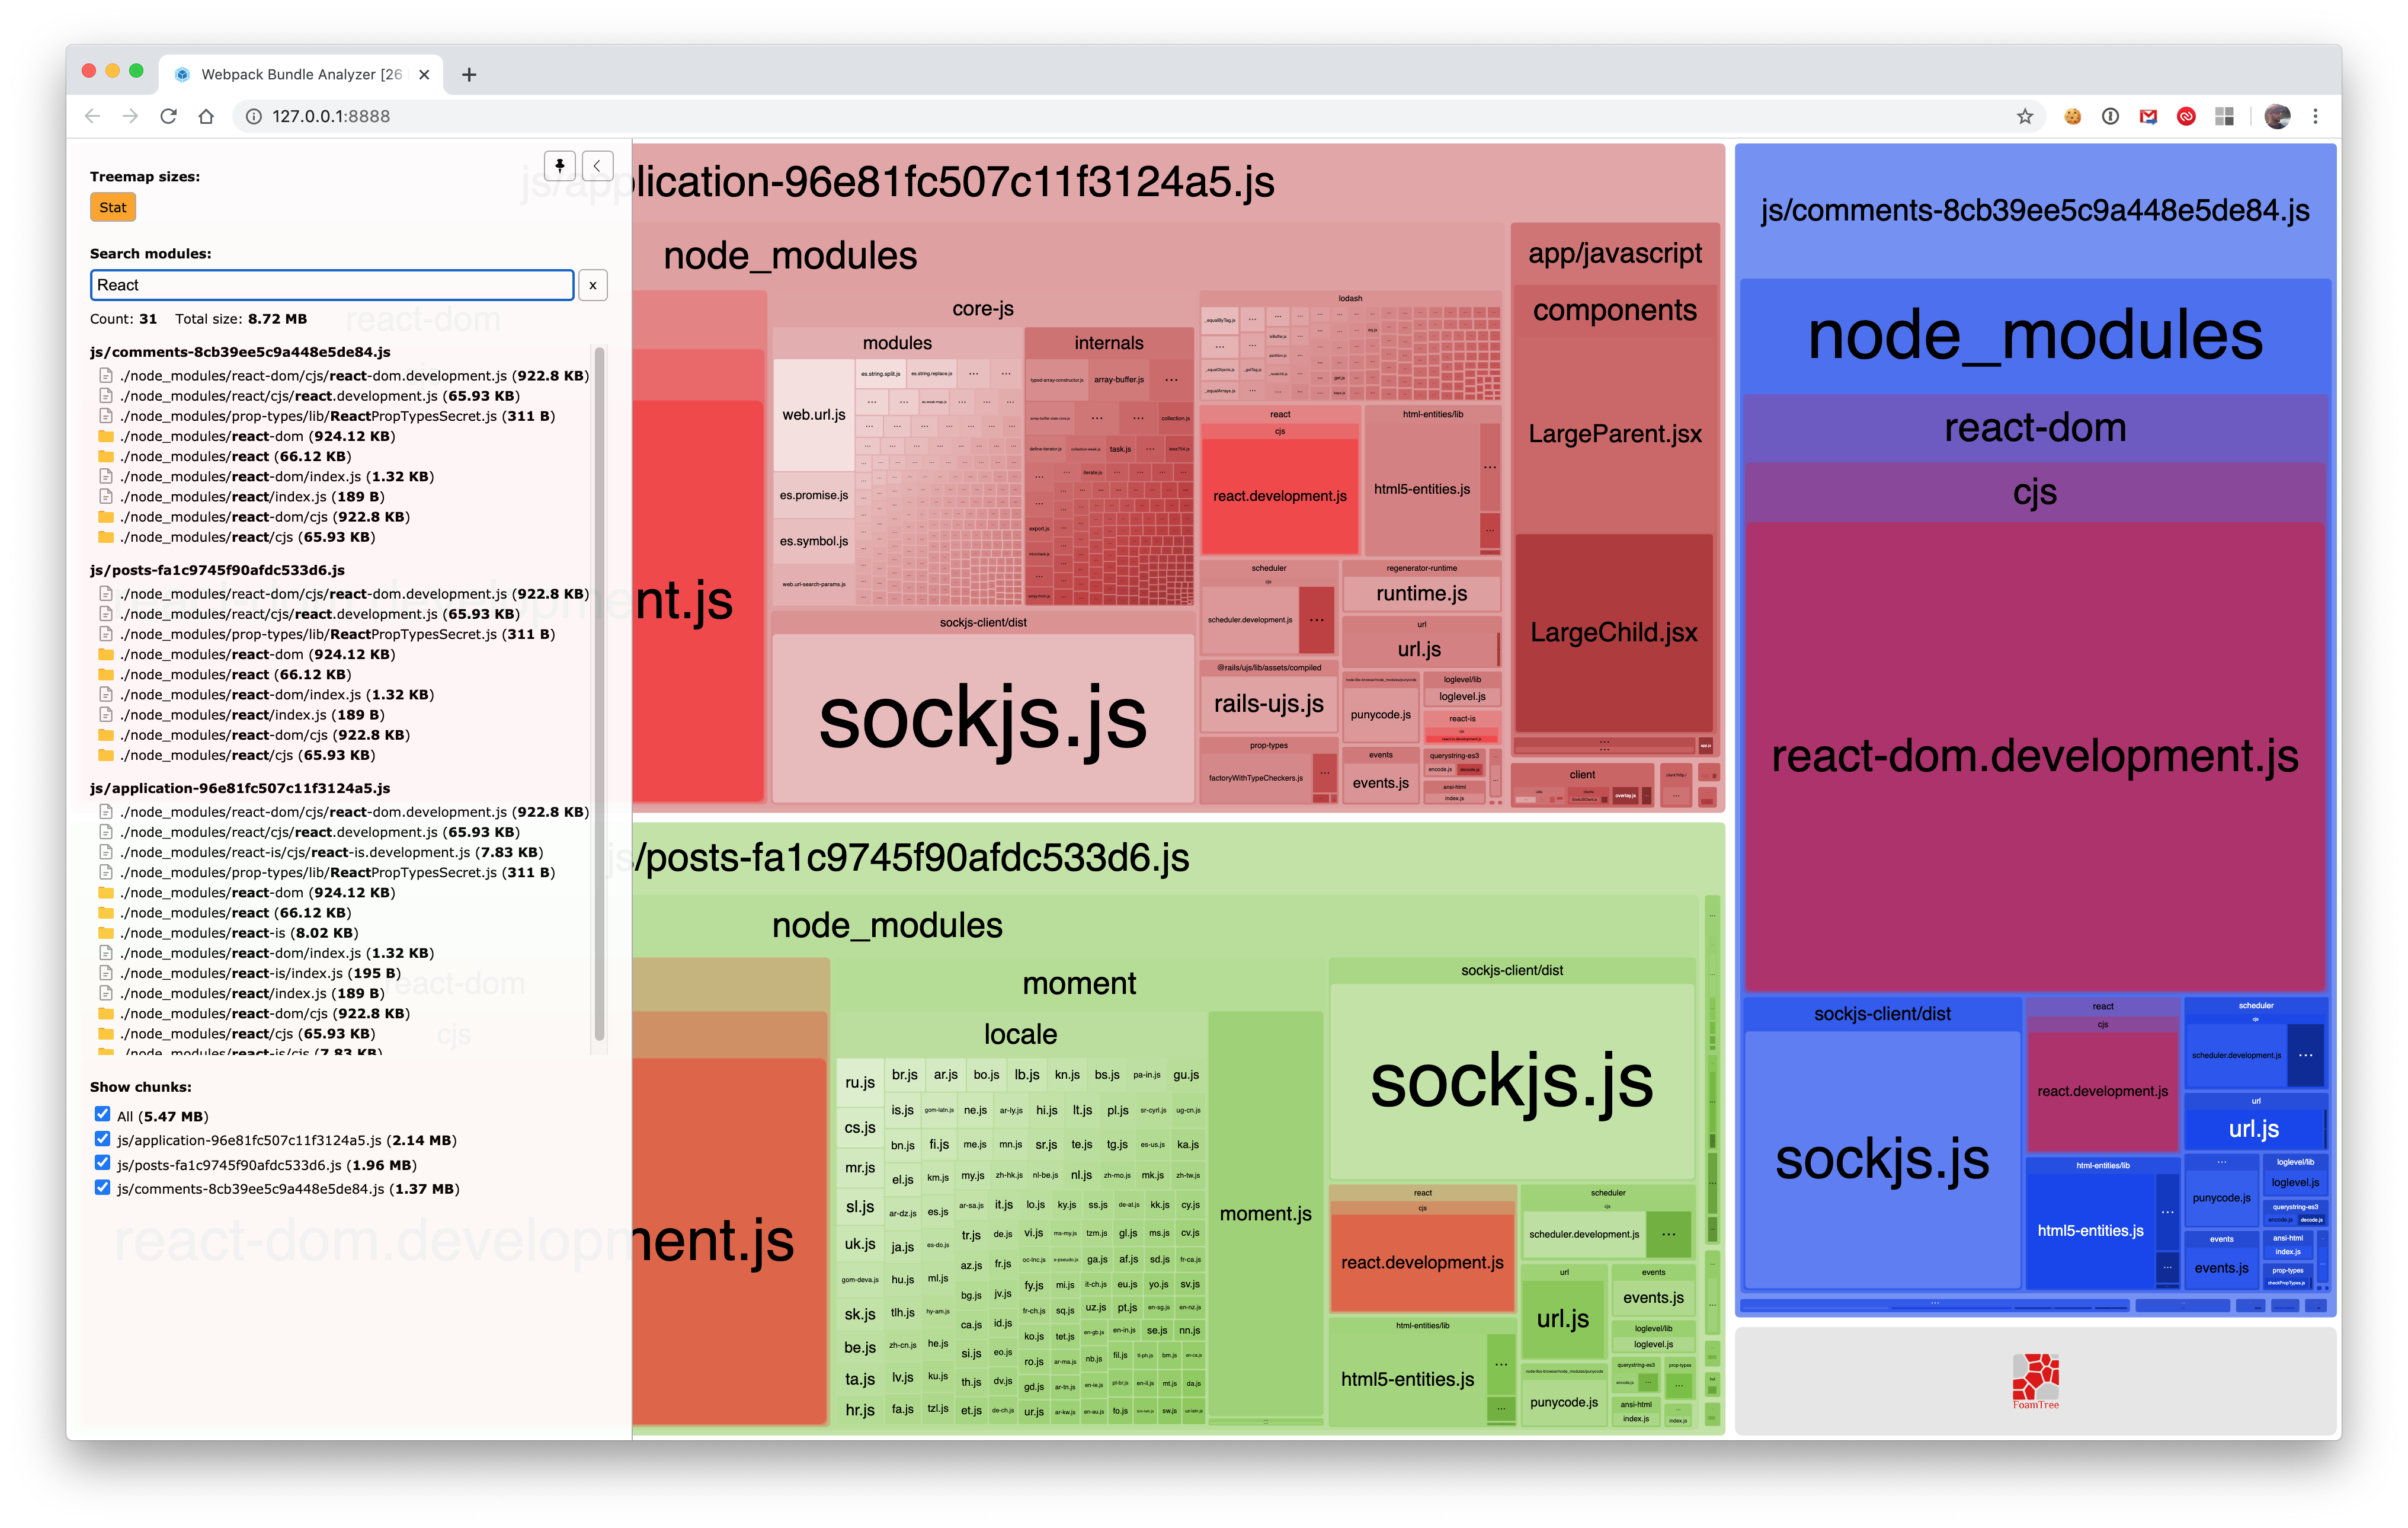
The analyzer will represent multiple bundles as distinct colors with relative sizes:
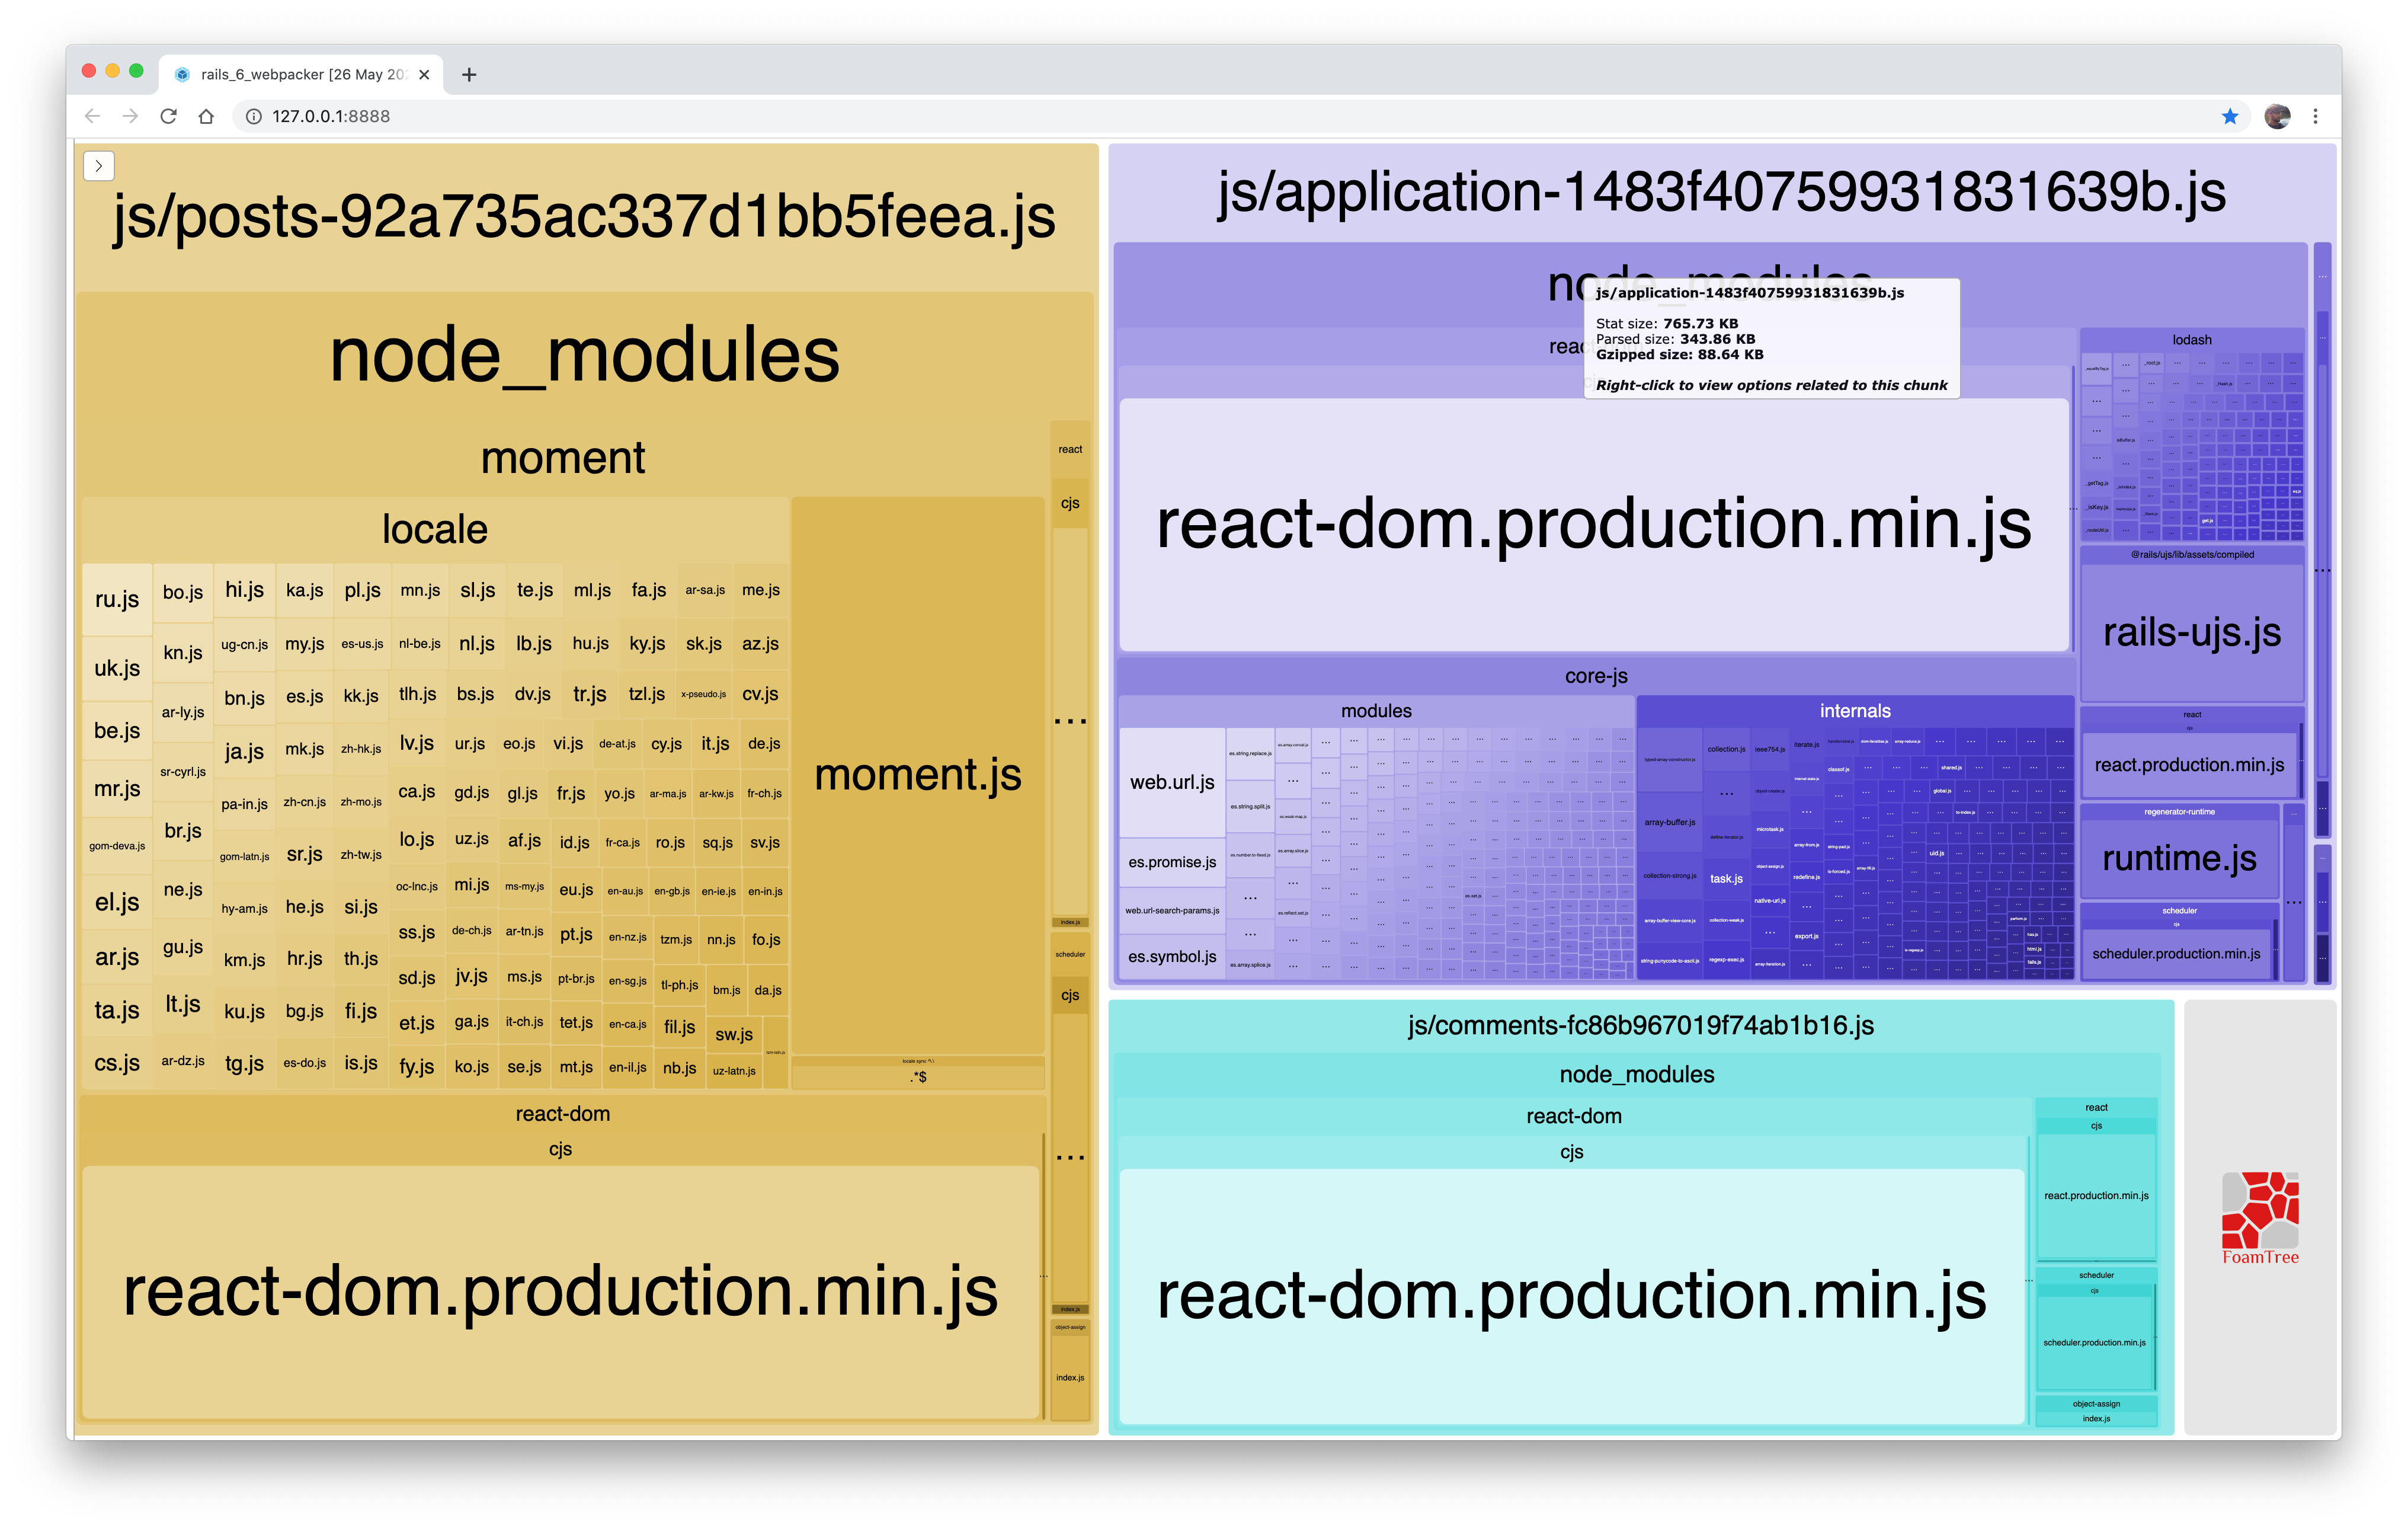
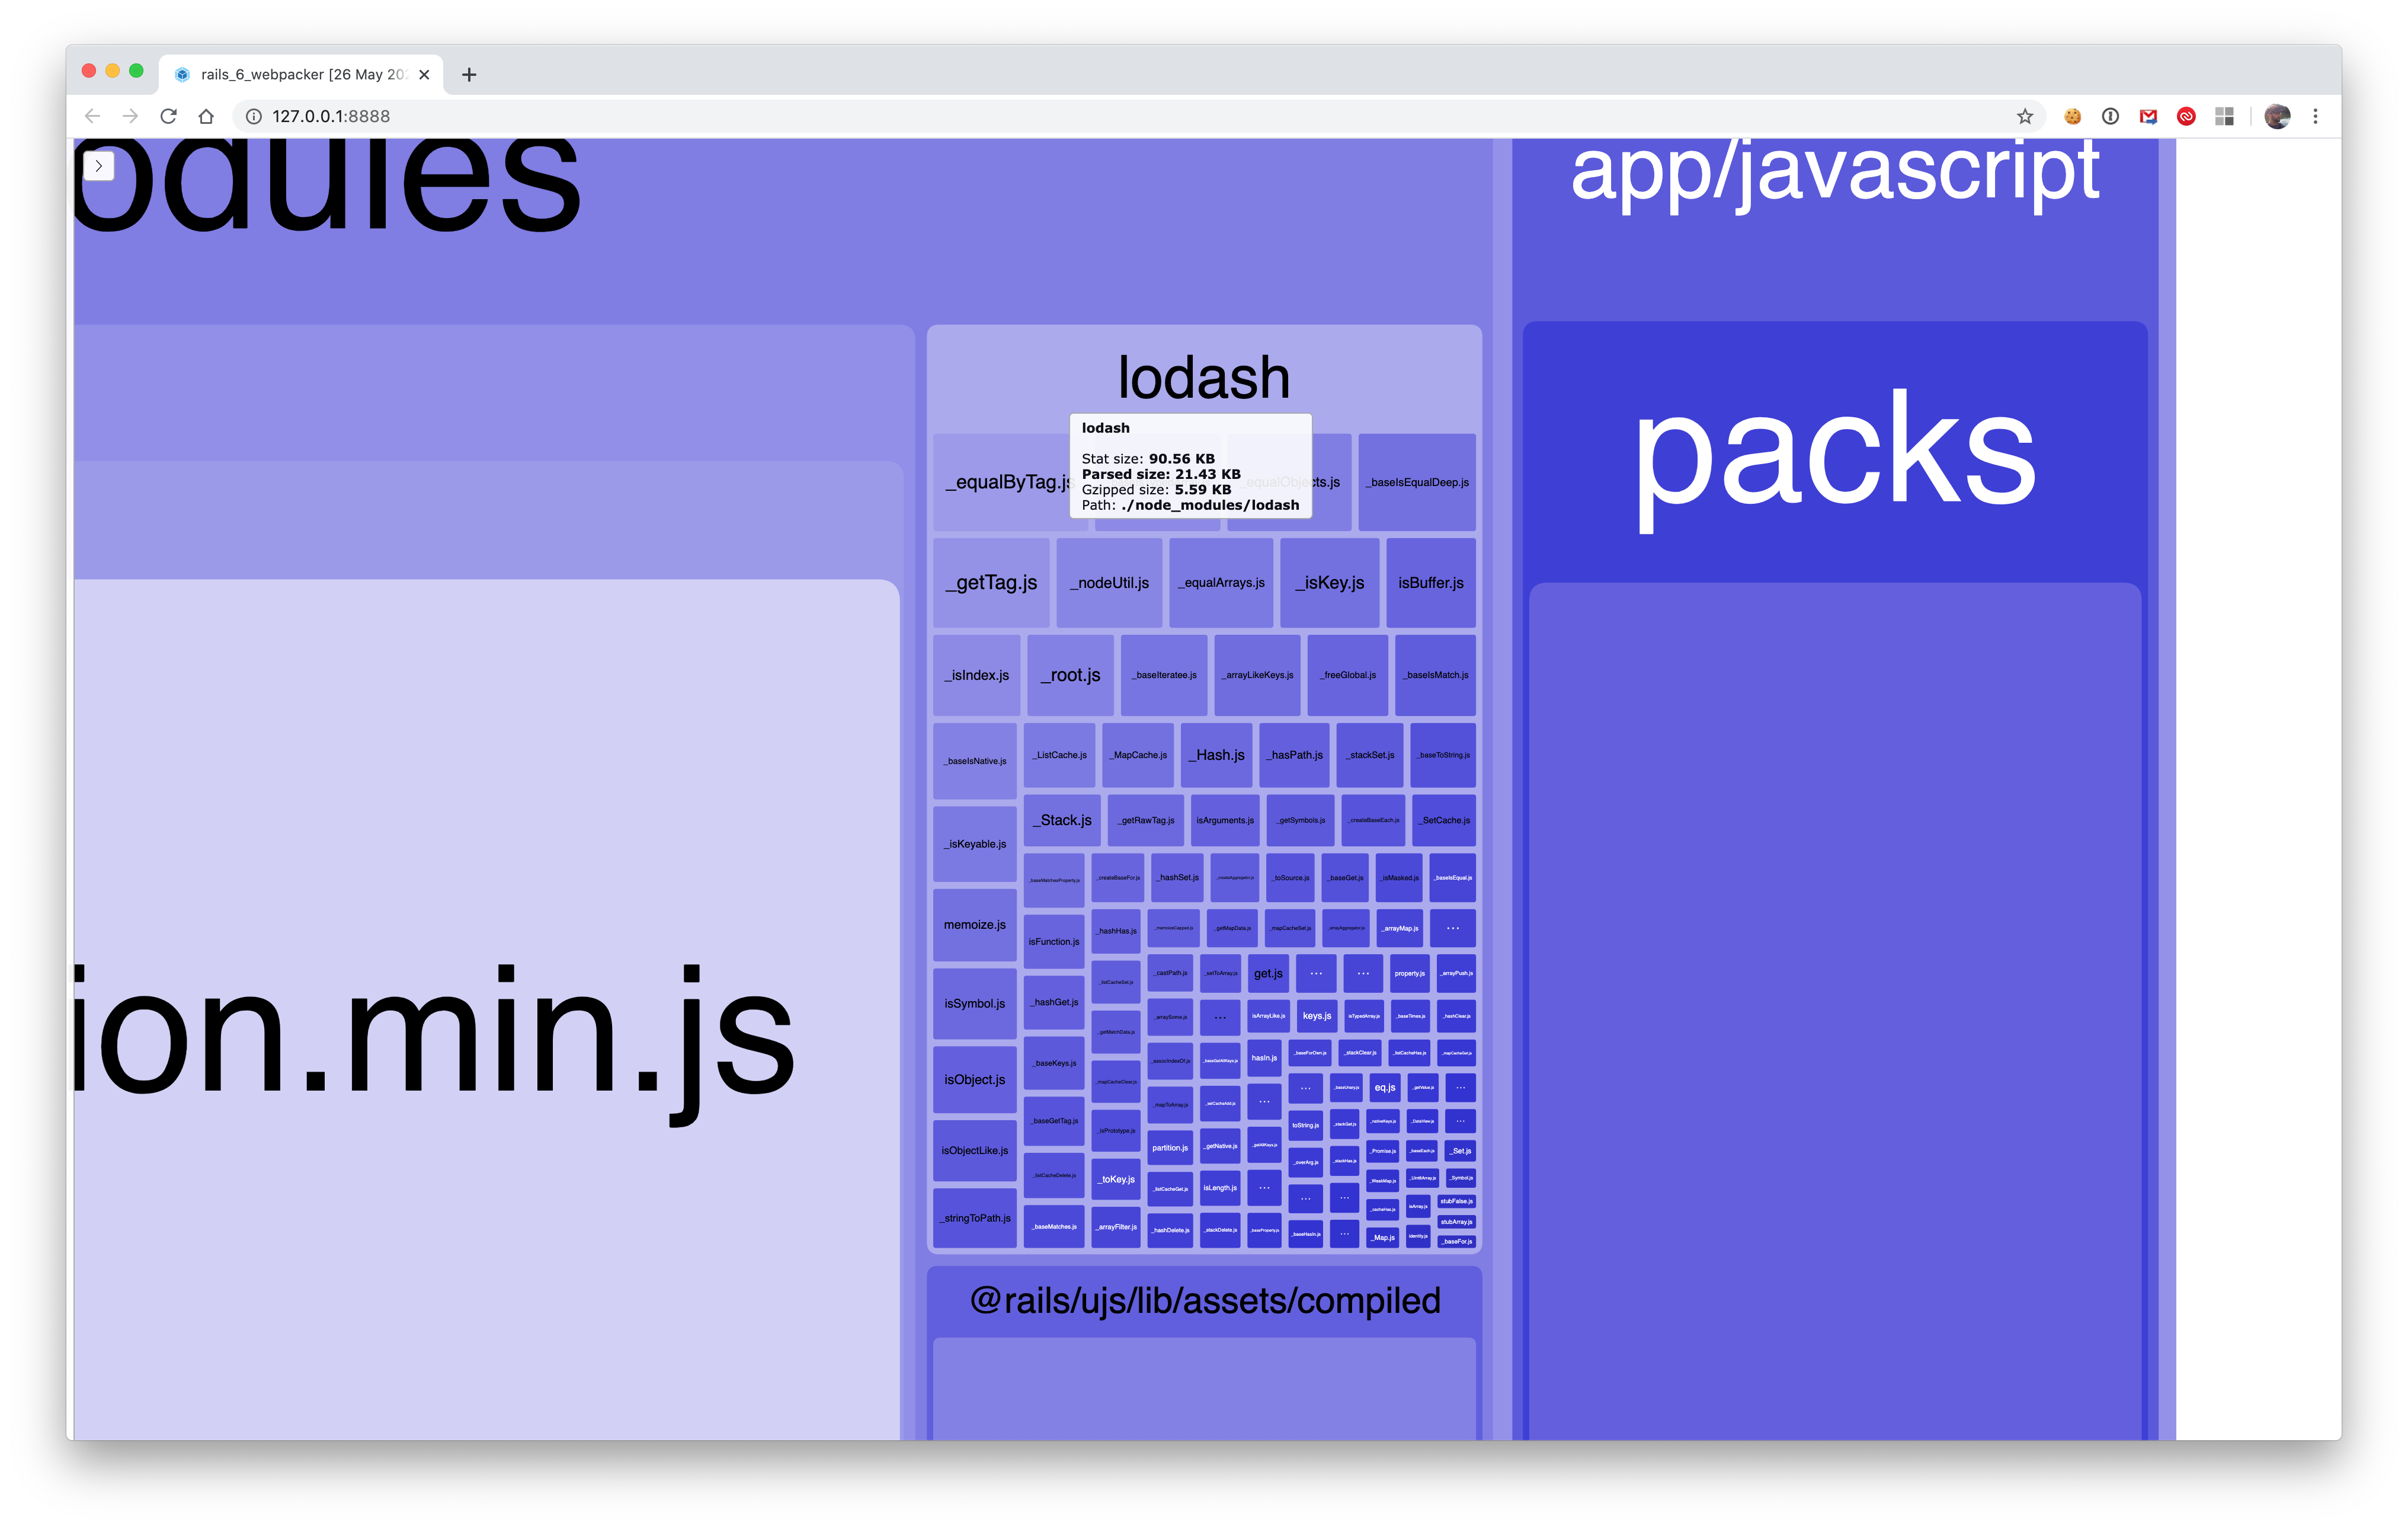
Individual modules are displayed in their relative sizes. Hover over bundles and modules to view statistics. Click or scroll to zoom in:
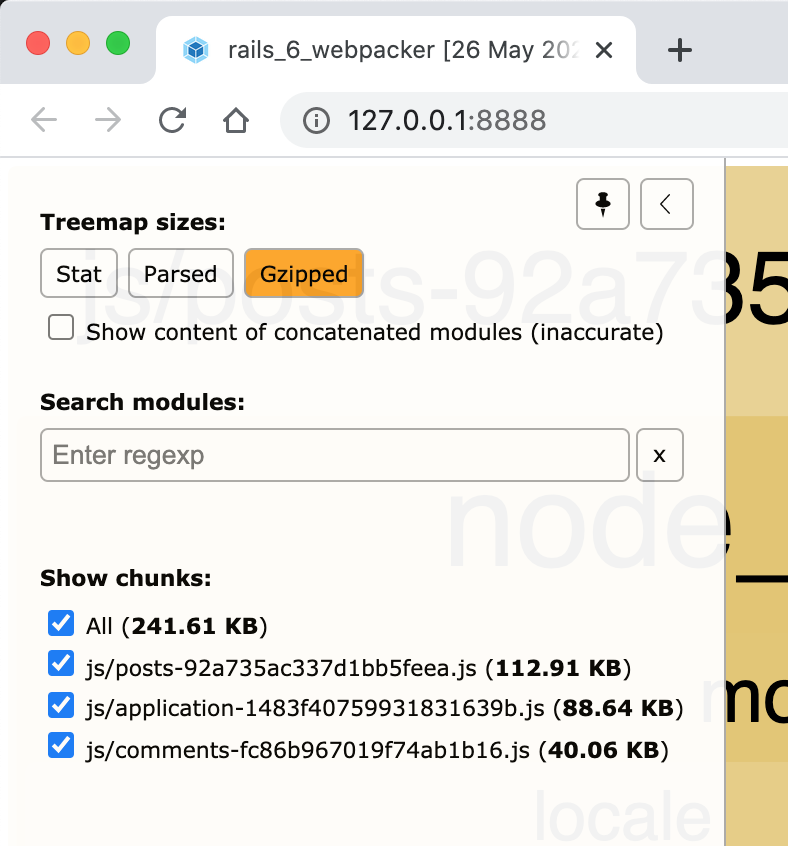
Use the slide-out menu on the left to toggle the gzipped and parsed ("un"-gzipped) bundles:
Highlight modules that match a search phrase, like "react":
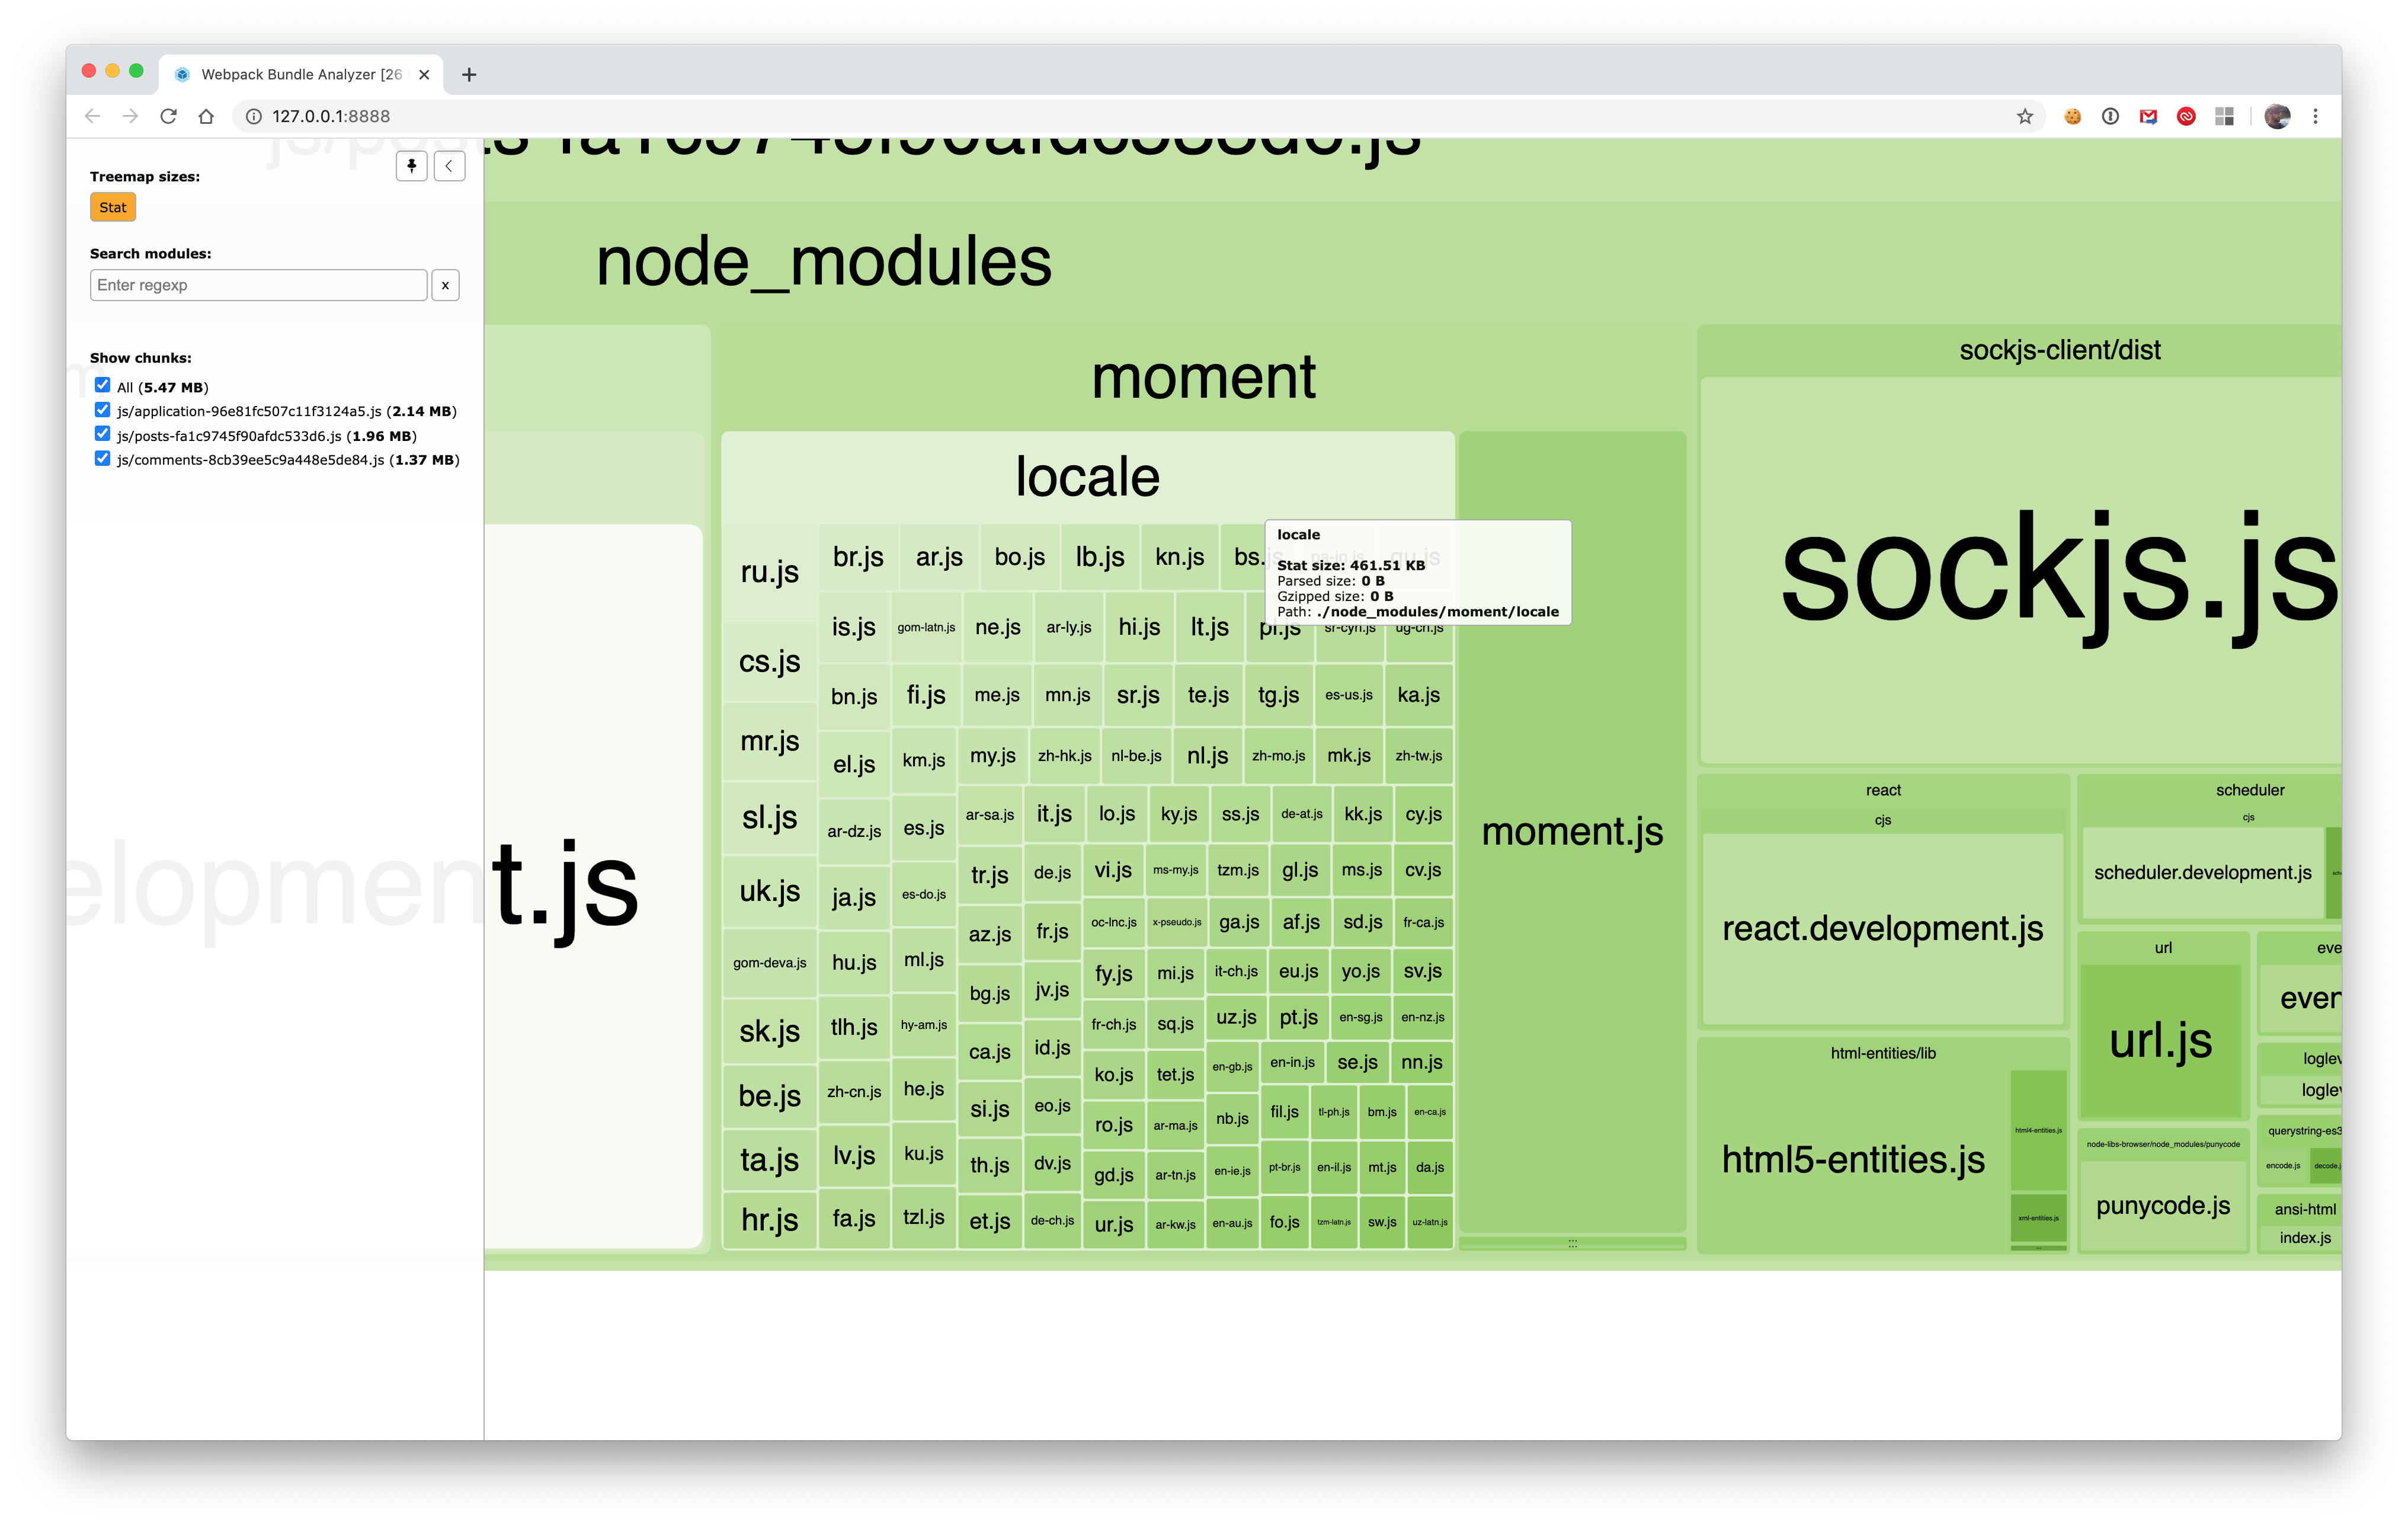
Are you using Moment.js? It might be including translations for all its locales by default at enormous cost. Consider using only the locales you need.
Key questions
Here are just some examples of questions the webpack-bundle-analyzer can help answer:
- Why is this bundle so large?
- What are the relative sizes of each bundle in the webpack build?
- What are the relative sizes of each module in the webpack build?
- Where is my business logic bundled?
- Are the modules I expect included?
- Are any modules included more than once?
- Are there modules I expect to be excluded?
- Which third-party libraries are bundled?
- Which bundle contains $MODULE_NAME?
- Is tree-shaking* working?
- WTF is in this bundle?
Glossary alert "Tree shaking" is jargon for dead code elimination: the process of removing unreferenced code from your build. Webpack will perform tree shaking when running in "production" mode which is enabled when building assets using
rake assets:precompileor via./bin/webpackwithRAILS_ENV=productionandNODE_ENV=production. I'll share more about how to take full advantage of tree shaking in future posts.
In short, webpack-bundle-analyzer graphs what is happening in your build. It can help you debug unexpected behavior or optimize your build output to reduce bundle size. All that, in service of better user experience!
Installation
The webpack-bundle-analyzer is distributed as an NPM package. To install via yarn:
yarn add --dev webpack-bundle-analyzer
Since this tool is typically only useful for local development, we add it to devDependencies using the --dev flag.
Usage
To use the webpack-bundler-analyzer, you can either integrate it as a plugin to your Webpacker configuration or you use a two-step command line process.
Typically, it makes the most sense to analyze the output of production builds since they will be what's delivered to the client and may contain several optimizations that will make the output differ significantly from the development build. Analyzing the development build can still be useful for additional context when debugging.
Though the instructions are tailored to a Rails project using Webpacker, you could adapt them to any webpack project.
When the analyzer is run, it will launch a local webserver; visit http://locahost:8888 to view the treemap. The port is configurable, and you'll need to hit Ctrl+C to stop the server.
Option 1: Analyze JSON from command line
The webpack-bundle-analyzer package ships with a command-line interface (CLI) that can ingest a webpack JSON stats file. In other words, it's a two-step process in which we generate a webpack build that's outputs build stats to a JSON file and then run the webpack-bundle-analyzer CLI to analyze the build stats and the output bundles generated in the build:
In a Rails project, we might typically first run the webpack build:
bin/webpack --profile --json > tmp/webpack-stats.json
Then we would analyze the output with the command webpack-bundle-analyzer [stats file] [output directory]:
npx webpack-bundle-analyzer tmp/webpack-stats.json public/packs
npxis a separate command-line interface that is installed along withnode. It will look for the command you specify in your locally installednode_modules. In other words, this replaces./bin/node_modules/webpack-bundle-analyzer .... Get this: withnpx, the package script you're trying to run doesn't even need to be installed! Yes, that's right: if you want, you can skipyarn add webpack-bundle-analyzer. Usenpx webpack-bundler-analyzeras if it's installed globally.npxwill search your locally installed packages and will look up the package on the remote npm registry when not found locally. Pretty cool!
Since I don't want to type all that out every time, I put those commands in the scripts section of my package.json:
// package.json
{
  // ...
  "scripts": {
    "webpack:analyze": "yarn webpack:build_json && yarn webpack:analyze_json",
    "webpack:build_json": "RAILS_ENV=${RAILS_ENV:-production} NODE_ENV=${NODE_ENV:-production} bin/webpack --profile --json > tmp/webpack-stats.json",
    "webpack:analyze_json": "webpack-bundle-analyzer tmp/webpack-stats.json public/packs"
  }
}
To analyze the build using these npm scripts, run:
yarn webpack:analyze
You could instead write this as a rake tasks as follows:
namespace :webpack do
  desc "Analyze the webpack build"
  task :analyze => [:build_json, :analyze_json]

  task :build_json do
    system "RAILS_ENV=#{ENV.fetch('RAILS_ENV', 'production')} \
     NODE_ENV=#{ENV.fetch('NODE_ENV', 'production')} \
     bin/webpack --profile --json > tmp/webpack-stats.json"
  end

  task :analyze_json do
    system "npx webpack-bundle-analyzer tmp/webpack-stats.json public/packs"
  rescue Interrupt
  end
end
To analyze the build using these rake tasks, run:
rake webpack:analyze
Option 2: Integrated setup
Instead of using separate scripts to trigger the bundle analyzer, you can instead incorporate the webpack-bundle-analyzer into your webpack configuration. Doing so runs the webpack-bundle-analyzer localhost server as a side effect of running the build command.
Below, we'll look at how you can integrate the analyzer into a Rails using Webpacker.
// config/webpack/environment.js
const { environment } = require('@rails/webpacker')

if (process.env.WEBPACK_ANALYZE === 'true') {
  const BundleAnalyzerPlugin =
    require('webpack-bundle-analyzer').BundleAnalyzerPlugin
  environment.plugins.append(
    'BundleAnalyzerPlugin',
    new BundleAnalyzerPlugin(),
  )
}

module.exports = environment
Note that the plugin is incorporated into the webpack config only with the environment variable WEBPACK_ANALYZE=true, so it is only added to the configuration as an opt-in feature.
To visualize the production build, run this command instead:
WEBPACK_ANALYZE=true RAILS_ENV=production NODE_ENV=production ./bin/webpack
You could even run the analyzer server alongside your webpack-dev server with WEBPACK_ANALYZE=true ./bin/webpack-dev-server to get instant feedback. Keep in mind that the bundle analysis while in development mode will yield different results from the production build.
Rails template
For your convenience, I packaged this changeset as a Rails template on railsbytes.com.
You can preview this template at https://railsbytes.com/public/templates/Xo5sYr. To use the template, skip the steps above and run the following command:
rails app:template LOCATION="https://railsbytes.com/script/Xo5sYr"
What's next?
So you've set up the webpack-bundle-analyzer and started understanding what's happening in your webpack bundles, what now? You may have noticed some things you don't like. In future posts, I'll be examining how you can deal with the excesses, including:
- Replacing libraries with built-in browser functionality or smaller packages
- Taking full advantage of tree-shaking with imports
- Using webpack to filter out unnecessary imports
- The "right way" to split bundles for multi-page applications
- Code-splitting with dynamic imports
Until then, here are some more resources you can use:
