Building basic Connect Four with Vue.js
From static HTML to dynamic rendering of components with Vue.js
This post is part of a series on building Connect Four with Vue.js, SVG, Elixir, and the Phoenix framework.
Lately, I've gotten excited about the Vue.js JavaScript framework view rendering due to its versatility, low barrier to entry, and community supported extensions for state management and routing. In this post, we'll use Vue.js 2 to dynamically render the Connect Four game board we started last time. This will not be a complete tutorial on Vue.js, but it hopefully will illustrate some of Vue's basic concepts and its powerful and intuitive features. Check out the excellent Vue.js guides for a thorough introduction to the framework.
To see where we'll end up, here's a pen:
See the Pen Connect Four Vue.js, SVG: first pass by Ross Kaffenberger (@rossta) on CodePen.
Breaking it down
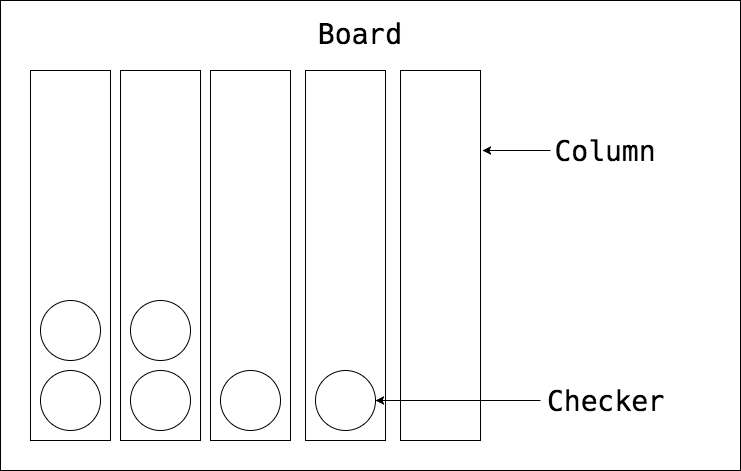
We'll use Vue.js to convert the static layout, which renders the Connect Four board in SVG with a few checkers in place as shown below:
<!-- board -->
<svg viewBox="0 0 700 600" xmlns="http://www.w3.org/2000/svg">
  <!-- defs for svg pattern masking -->

  <!-- column 0 -->
  <svg x="0" y="0">

    <!-- checker -->
    <circle cx="50" cy="550" r="45" fill="#254689"></circle>

    <rect width="100" height="600" fill="cadetblue" mask="url(#cell-mask)"></rect>
  </svg>

  <!-- column 1 -->
  <svg x="100" y="0">
    <rect width="100" height="600" fill="cadetblue" mask="url(#cell-mask)"></rect>
  </svg>

  <!-- and more columns... -->

</svg>
It's easy to spot some repetition. There are a fixed number of columns of the same dimensions and appearance, each of which may contain checkers. As Vue.js is a component based framework, we'll want to break these pieces into logical units: the game will be composed of a single Board component, which will render all the Column components, each of which will render their "stack" of Checker components. Here's how we might visualize this breakdown:
Aside from this hierarchy, we also will make an informal distinction to describe the Board, Column, and Checker: they are "presentation" components. Notably, their main role is to determine how the app will look. We'll wrap the Board in a "container" component, whose main role is to determine how the app will work. For more on this distinction, check out Dan Abramov's React article on Presentational and Container Components.
For our game, a GameContainer component will keep track of and manipulate the key
game state, including adding checkers when a player selects a column, toggling
the player turns, and, later, determine if a player has won the game. Here's
the complete component hierarchy in Vue/HTML pseudocode:
<game-container> <!-- state: checkers, current player -->
  <game-board :checkers="checkers"> <!-- state: board dimensions -->
    <board-column v-for="column in columns" :stack="stack(column)">
      <board-checker v-for="checker in stack"></board-checker>
    </board-column>
  </game-board>
</game-container>
In practice, our presentation components will keep some of their own state and logic as well, but it will be very specfic to the local concerns of that component; when a presentation component needs to know about higher level state, it will be passed in as props from its parent. Any events triggered in the user interface will be passed back up the heirarchy, eventually reaching our container; "actions up, data down". For this first pass, the main action will be clicking a column in which to drop the next checker.
The container
The GameContainer component be the source of truth for the key game-level
concerns including an object to store the checkers that have been played and
numbers representing row and column (abbreviated throughout the code as col)
counts. For now, we'll also hardcode the first player to "red". The
GameContainer markup is simply to render the GameBoard, which will receive
data from the container via props.
const GameContainer = Vue.component('game-container', {
  data() {
    return {
      checkers: {},
      playerColor: 'red',
      rowCount: 6,
      colCount: 7,
      // ...
    };
  },

  // ...
<!-- game-container-template -->
<game-board :checkers="checkers" :rowCount="rowCount" :colCount="colCount"></game-board>
Note that I've chosen to store checker data in an object, where each checker will be
identified by a key based on its row and column number. Each value in the
checkers object will itself be an object with properties for row, column,
color of a dropped checker, i.e., { row, col, color }. A common alternative for
storing data in a grid-based game is to use an array of arrays; I personally
have found it easier to represent the grid in a map-like data structure, such
as a JavaScript object, to manipulate, search for, and perform transformations
on game data. Either approach would work for the purpose of this demo—the
mechanics of getting and setting checker data in the GameContainer would just
differ slightly.
The board
The GameBoard has the primary responsibility of defining the dimensions of
the board layout, based off the row and column counts it receives from the
GameContainer and the size of each cell, which will come from local data.
From this data, the board computes board width and height and the radius of
each checker. The GameBoard will also be responsible for filtering the
checkers specific to each column into the correct BoardColumn children
components, as shown in the checkerStack(col) function.
const GameBoard = Vue.component('game-board', {
  data() {
    return {
      cellSize: 100,
    };
  },

  computed: {
    cols() { return range(this.colCount); },

    boardWidth() { return this.colCount * this.cellSize; },
    boardHeight() { return this.rowCount * this.cellSize; },
    checkerRadius() { return this.cellSize * 0.45; },

    // ...
  },

  methods: {
    checkerStack(col) {
      return Object.values(this.checkers).filter(c => c.col === col);
    },
  },

  // ...
A neat trick here is to use a custom range function that converts the
colCount into a list of 0..colCount-1 to identify the columns, using the
spread operator and the Array.prototype.keys function:
const range = num => [...Array(num).keys()];
// range(7)
// [0, 1, 2, 3, 4, 5, 6]
In the GameBoard template, we're able convert the hard-coded width, height,
, x, and y positions of our original SVG layout to dynamic properties. The
GameBoard also renders each of the BoardColumn components using the v-for
directive on our col range, again, passing key game state and checker data
as props. The props also include the url to the pattern <mask> that will
give the columns the transparent portholes, as discussed in the previous
post.
<!-- game-board-template -->
<svg :viewBox="`0 0 ${boardWidth} ${boardHeight}`"
  xmlns="http://www.w3.org/2000/svg">
  <defs>
    <pattern :id="patternId" :width="cellSize" :height="cellSize"
      patternUnits="userSpaceOnUse">
      <circle :cx="cellSize / 2" :cy="cellSize / 2" :r="checkerRadius" fill="black"></circle>
    </pattern>
    <mask :id="maskId">
      <rect :width="cellSize" :height="boardHeight" fill="white"></rect>
      <rect :width="cellSize" :height="boardHeight" :fill="pattern"></rect>
    </mask>
  </defs>
  <board-column
    v-for="col in cols"
    :checkers="checkerStack(col)"
    :col="col"
    :mask="mask"
    ...  />
</svg>
For more on the <defs>, <pattern>, and <mask> elements, see the previous
article on SVG pattern
masking.
The columns
Now on to the BoardColumn component and its template. It is responsible for
rendering the pattern-masked <rect> and any checkers dropped in its column.
By wrapping the BoardColumn in a nested <svg> element with an x value based
off col * cellSize, the rendered child elements of the BoardColumn will be
positioned relatively within. Note how straightforward it is to add a click
listener to our template where we'll trigger a drop method on the
BoardColumn instance.
<!-- board-column-template -->
<svg :x="col * cellSize" y="0">
  <g @click="drop" class="column">
    <board-checker
      v-for="checker in checkers"
      :checker="checker"
      :cellSize="cellSize"
      :rowCount="rowCount"
      ...  />
    <rect :width="cellSize" :height="boardHeight" :fill="color" :mask="mask" />
  </g>
</svg>
Let's check out that drop method on BoardColumn.
const BoardColumn = Vue.component('board-column', {
  computed: {
    // Find the current max occupied row and add 1
    nextOpenRow() {
      return Math.max(...this.checkers.map(c => c.row).concat(-1)) + 1;
    },
  },

  methods: {
    drop(col) {
      const row = this.nextOpenRow;

      if (row < this.rowCount) {
        this.$emit('drop', { row, col });
      } else {
        console.log('cannot drop', { row, col });
      }
    },
  },
});
The method's responsibility is to trigger a 'drop' event up the component hierarchy
with data for { row, col }. This will indicate an attempt has been made to drop
a checker at that position. To accomplish this, it calculates the next
available row in the nextOpenRow function. If the next open row would be off
the board, then the column is full and the attempt is swallowed. We calculate
nextOpenRow by finding the max row number in the stack and adding one. If the
checker stack is empty in this column, then the result will be 0, which is
where we'd want the first checker to land.
Updating game state
Note this constitues some game logic so we're cheating a little given our
presentation/container distinction noted earlier; it may make more sense to
push this logic to our GameContainer later, but for now, it's convenient to
leave it here. As we'll see later, the GameContainer will respond to this
event and do the work to update the checkers map for the game.
Back in the GameContainer, an emitted drop event with { row, col } data is
captured here, where the game will add the current player's color as
property, update the checkers object, and toggle the color for the next
player.
const GameContainer = Vue.component('game-container', {
  methods: {
    toggleColor() {
      if (this.playerColor === RED) {
        this.playerColor = BLACK;
      } else {
        this.playerColor = RED;
      }
    },

    drop({ col, row }) {
      const color = this.playerColor;

      console.log('setting checker', key(row, col), { row, col, color });
      Vue.set(this.checkers, key(row, col), { row, col, color });
      this.toggleColor();
    },

    // ...
  },

  // ...
});
Note an important gotcha when using Vue.js demonstrated here: we need to use
Vue.set when adding a new checker to the checkers object. Vue needs to hook
into getters/setters to track dependencies and propagate data changes
throughout the application. Unfortunately, because of how JavaScript works,
Vue can't detect property addition or deletion. This affects how we
adding checkers to the underlying data structure during game play. By using
Vue.set, we ensure the data change results in rendering the new checker
on the game board.
The checkers
To render the checkers, we have a BoardChecker component. It is simply a <circle> element.
<!-- board-checker-template -->
<circle :cx="centerX" :cy="centerY" :r="checkerRadius" :fill="adjustedColor" />
The cx and cy properties are computed based on the checker object's row and the cellSize and rowCount properties passed in from the parent column. We translate the canonical red/black color names to prettier hex colors to fill each <circle>.
const BoardChecker = Vue.component('board-checker', {
  data() {
    return {
      colorHexes: {
        red: '#FC7E69',
        black: '#254689',
      },
    };
  },

  computed: {
    row() { return this.checker.row; },
    col() { return this.checker.col; },
    color() { return this.checker.color; },

    adjustedColor() {
      return this.colorHexes[this.color];
    },

    centerX() {
      return (this.cellSize / 2);
    },

    centerY() {
      return (this.cellSize / 2) + (this.cellSize * (this.rowCount - 1 - this.row));
    },
  },
});
Again, here's a link to the pen on codepen.io where you can see the full source code and try out the game for yourself.
This completes our first pass at using Vue.js to create a playable Connect Four game in the browser. We're not yet detecting a game win or draw; that's still to come. In the next post, we use Vue to animate each checker falling into place as they are added to the board.
